Your tripod is innovative
but using it is simple
To get the most out of your tripod, follow the guide below.
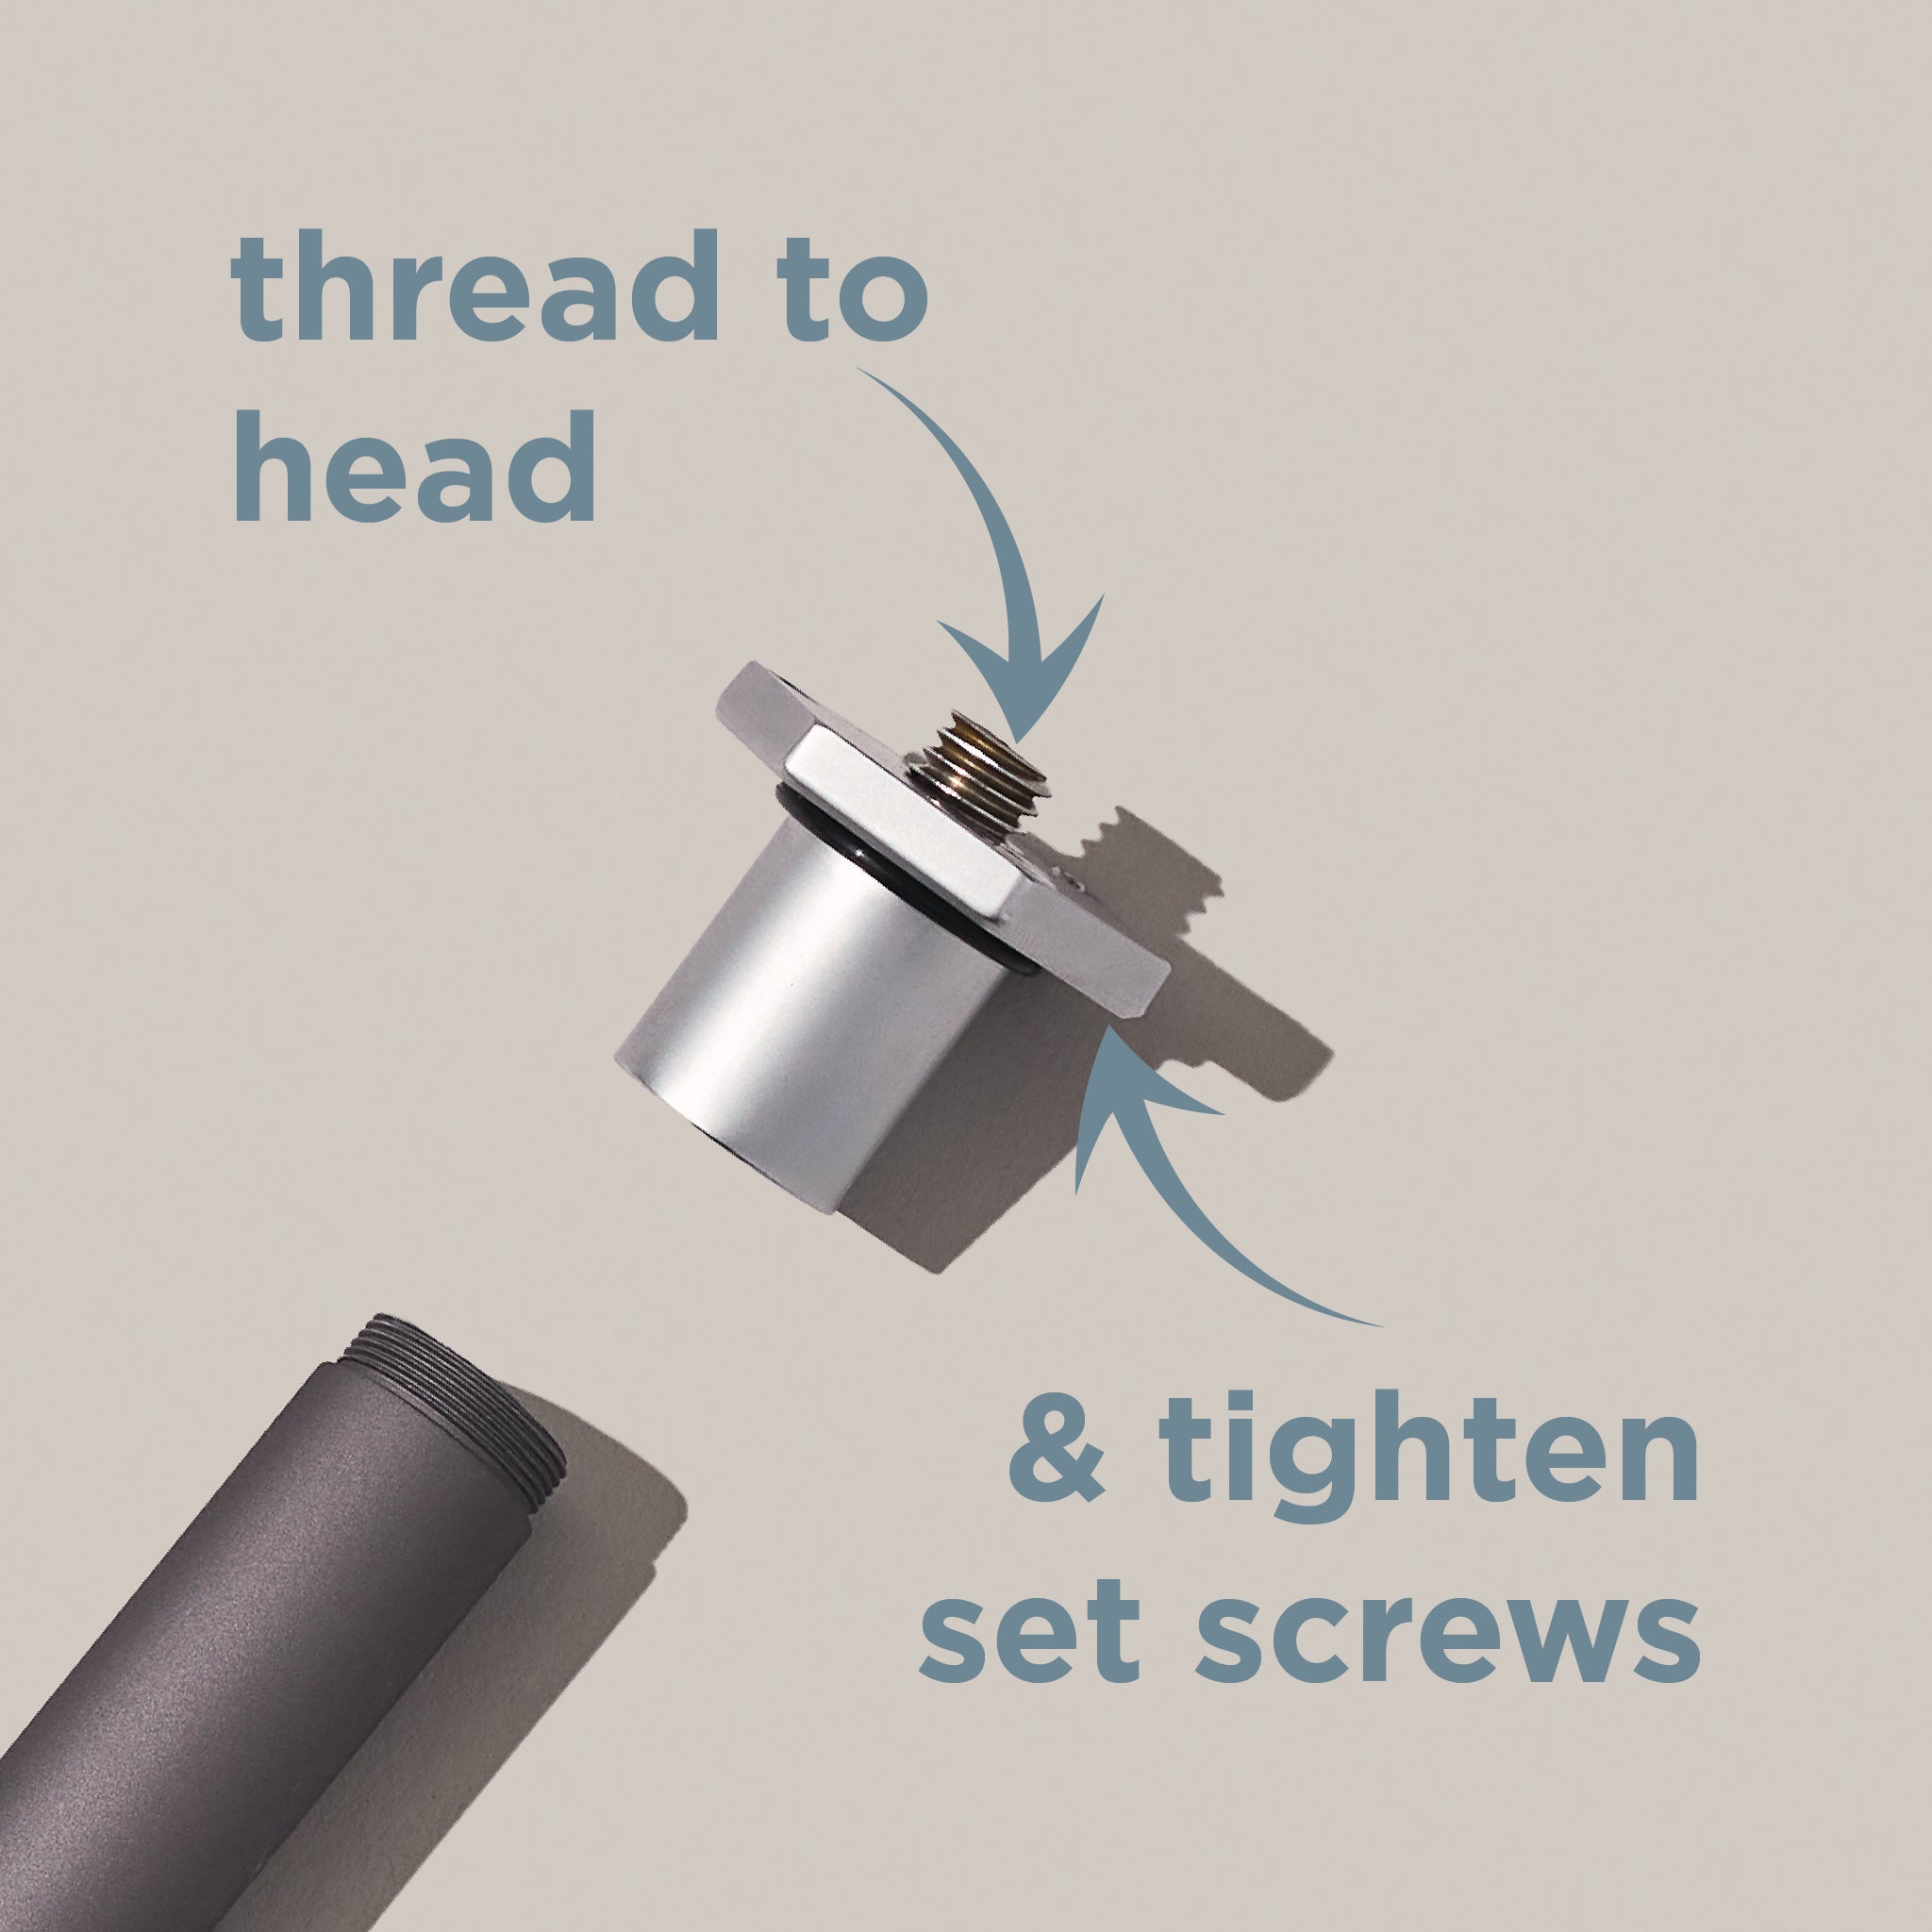
Attach your head
For easiest application, unthread the platform from the center column (optional) and ensure all three set screws are below the surface. Screw your head onto the threaded stud.
After connecting your tripod head, use the provided Allen wrench to lightly tighten the set screws against the bottom of your head. Do not over tighten.
Use of set screws locks you head in place and safeguards against undesired unthreading.
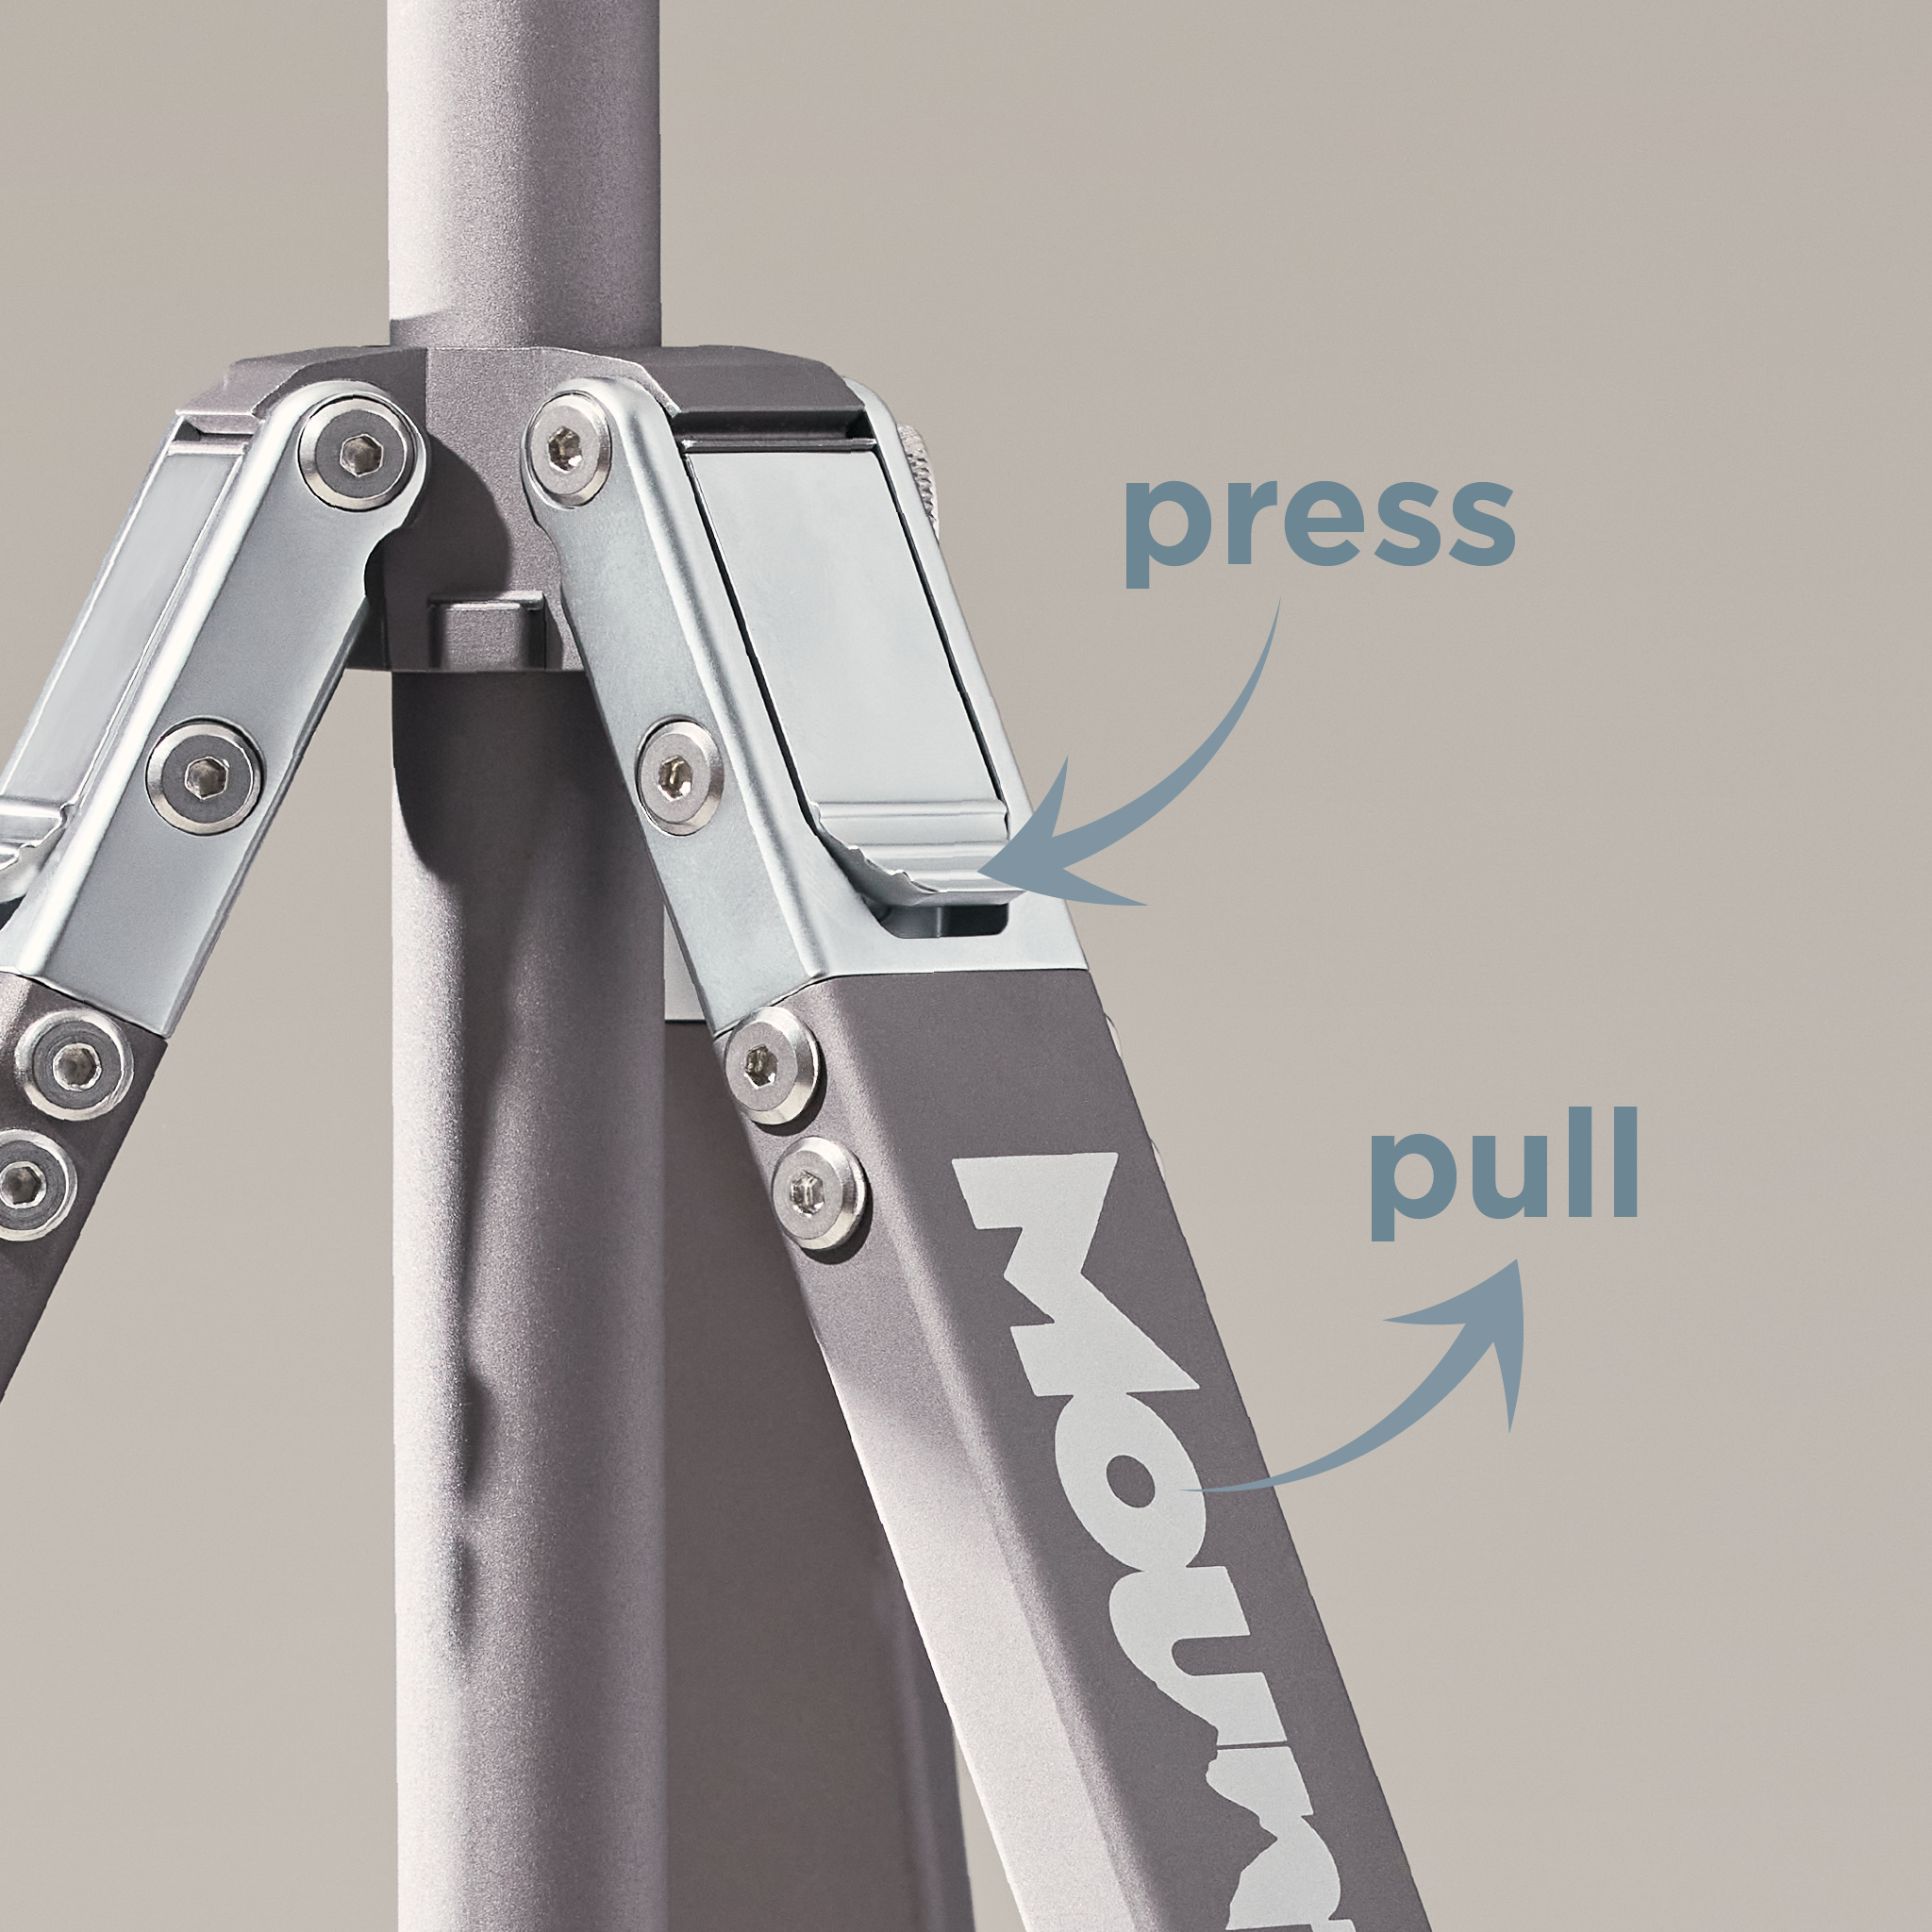
Angle Selection
Your Mountain Minimal™ tripod features two leg angle options.
To select the lesser of the two angles, gently pull leg away from the collapsed tripod until you reach a hard stop. To select the wider leg angle, press the top latch and situate tooth into the corresponding groove.
To decrease leg angle or completely collapse the tripod, simply guide the leg inwards as the angle selector ratchets shut.
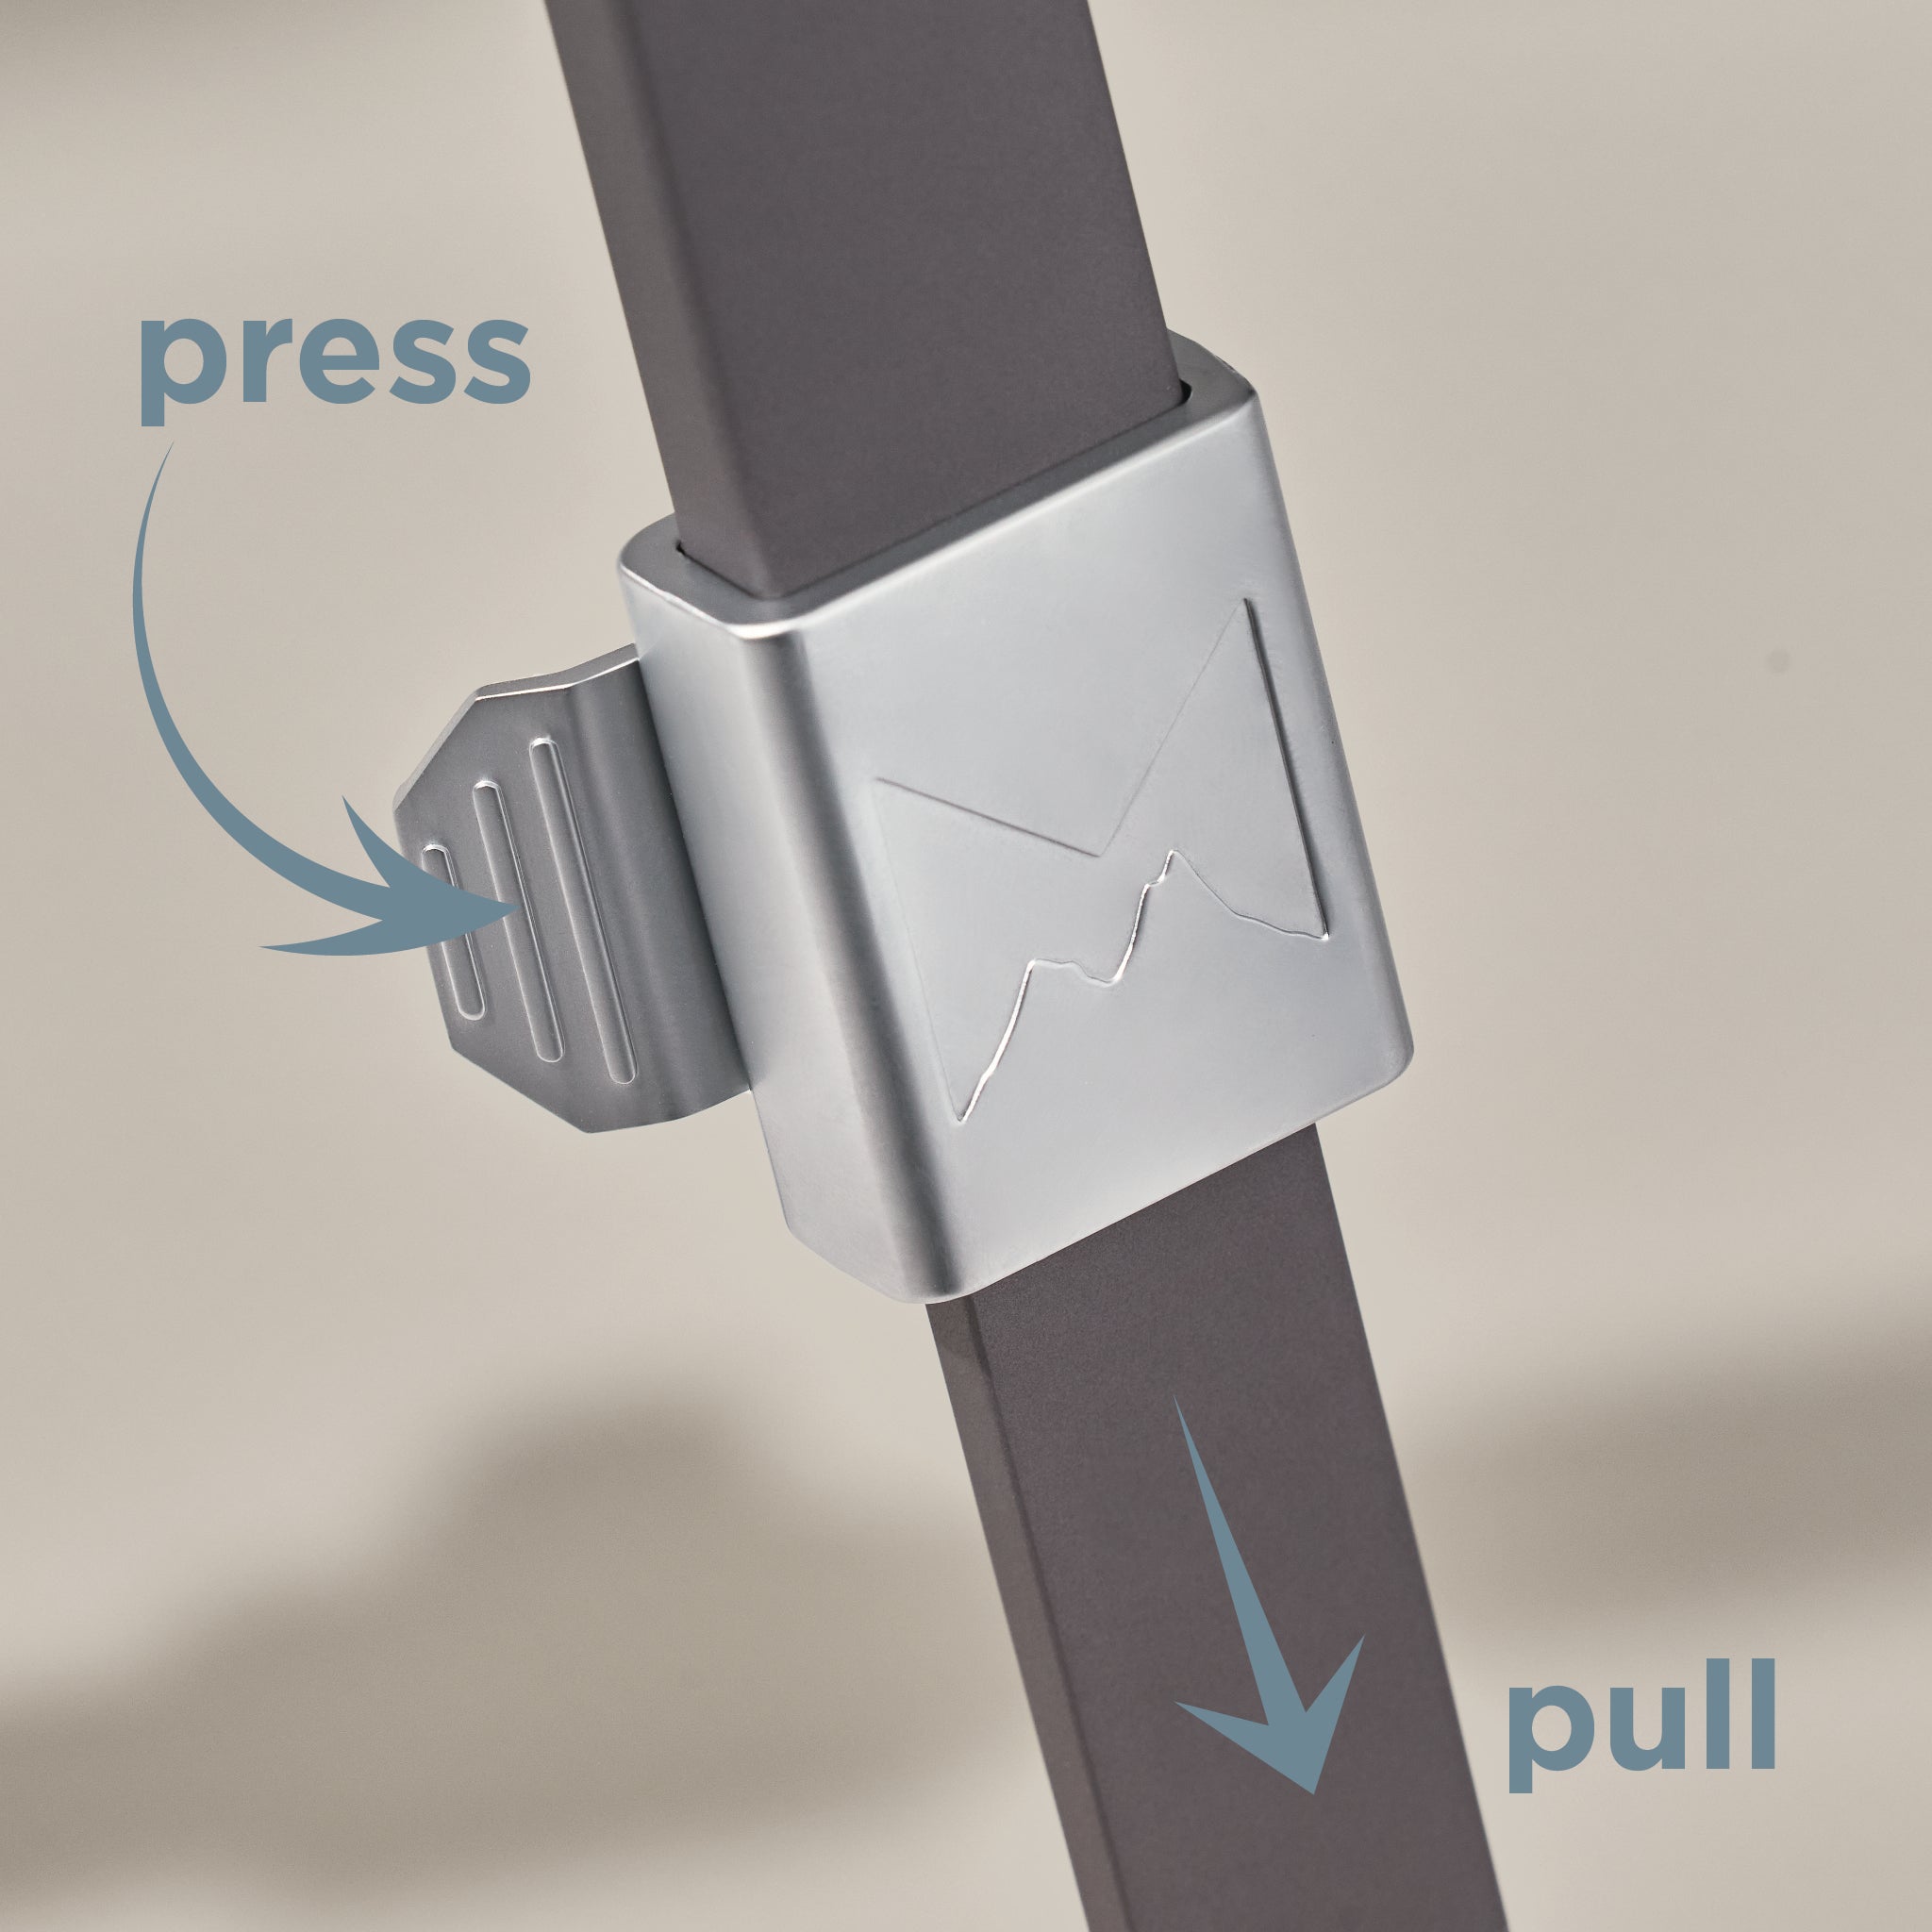
Leg Extension
The Nesting Leg Locks™ on your tripod function similarly to traditional flip locks, with the added perk of improved ergonomics, protection against involuntarily leg extensions, exposure to dirt and grime, and damage from impact.
Once you've selected your preferred leg angle, use your thumb to press the latch and release the locking function. Gently pull the leg section to the preferred length. Relock latch.
Pro Tip: To prioritize stability, fully extend upper leg sections prior to utilizing lower leg sections.
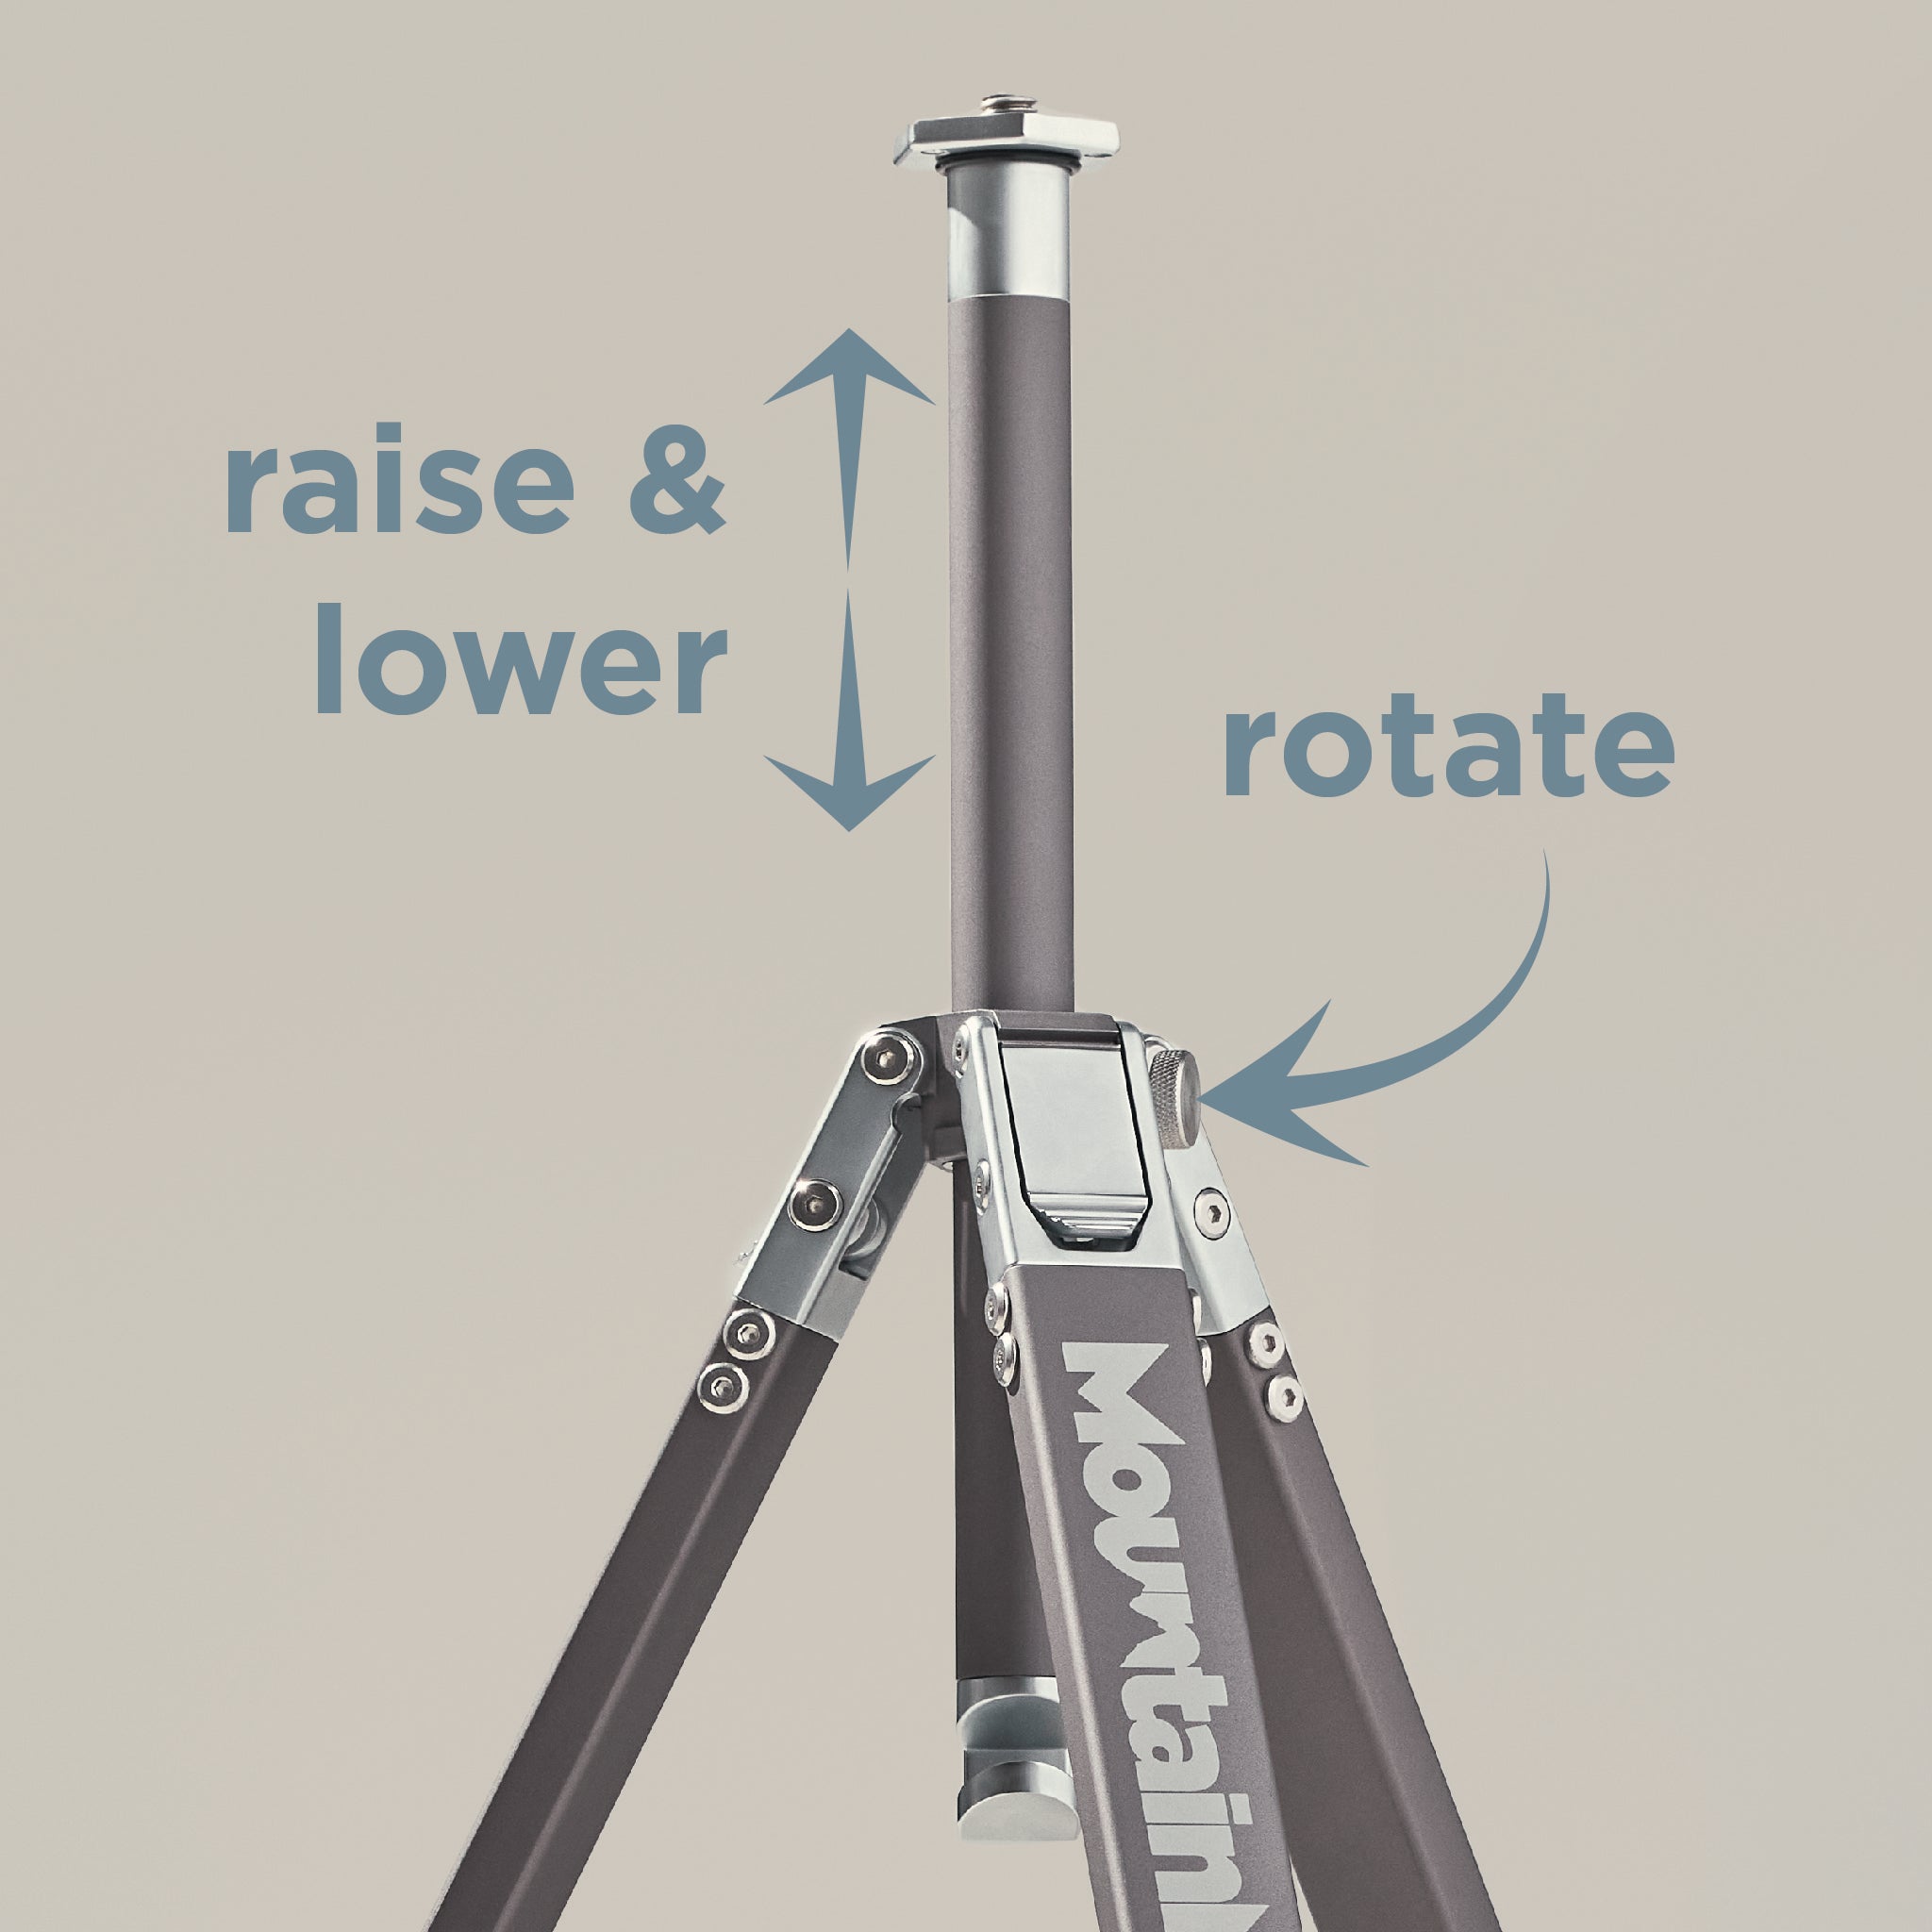
Center Column
To adjust the height of the center column, slightly loosen the thumb screw and raise or lower to preferred height before retightening the thumb screw.
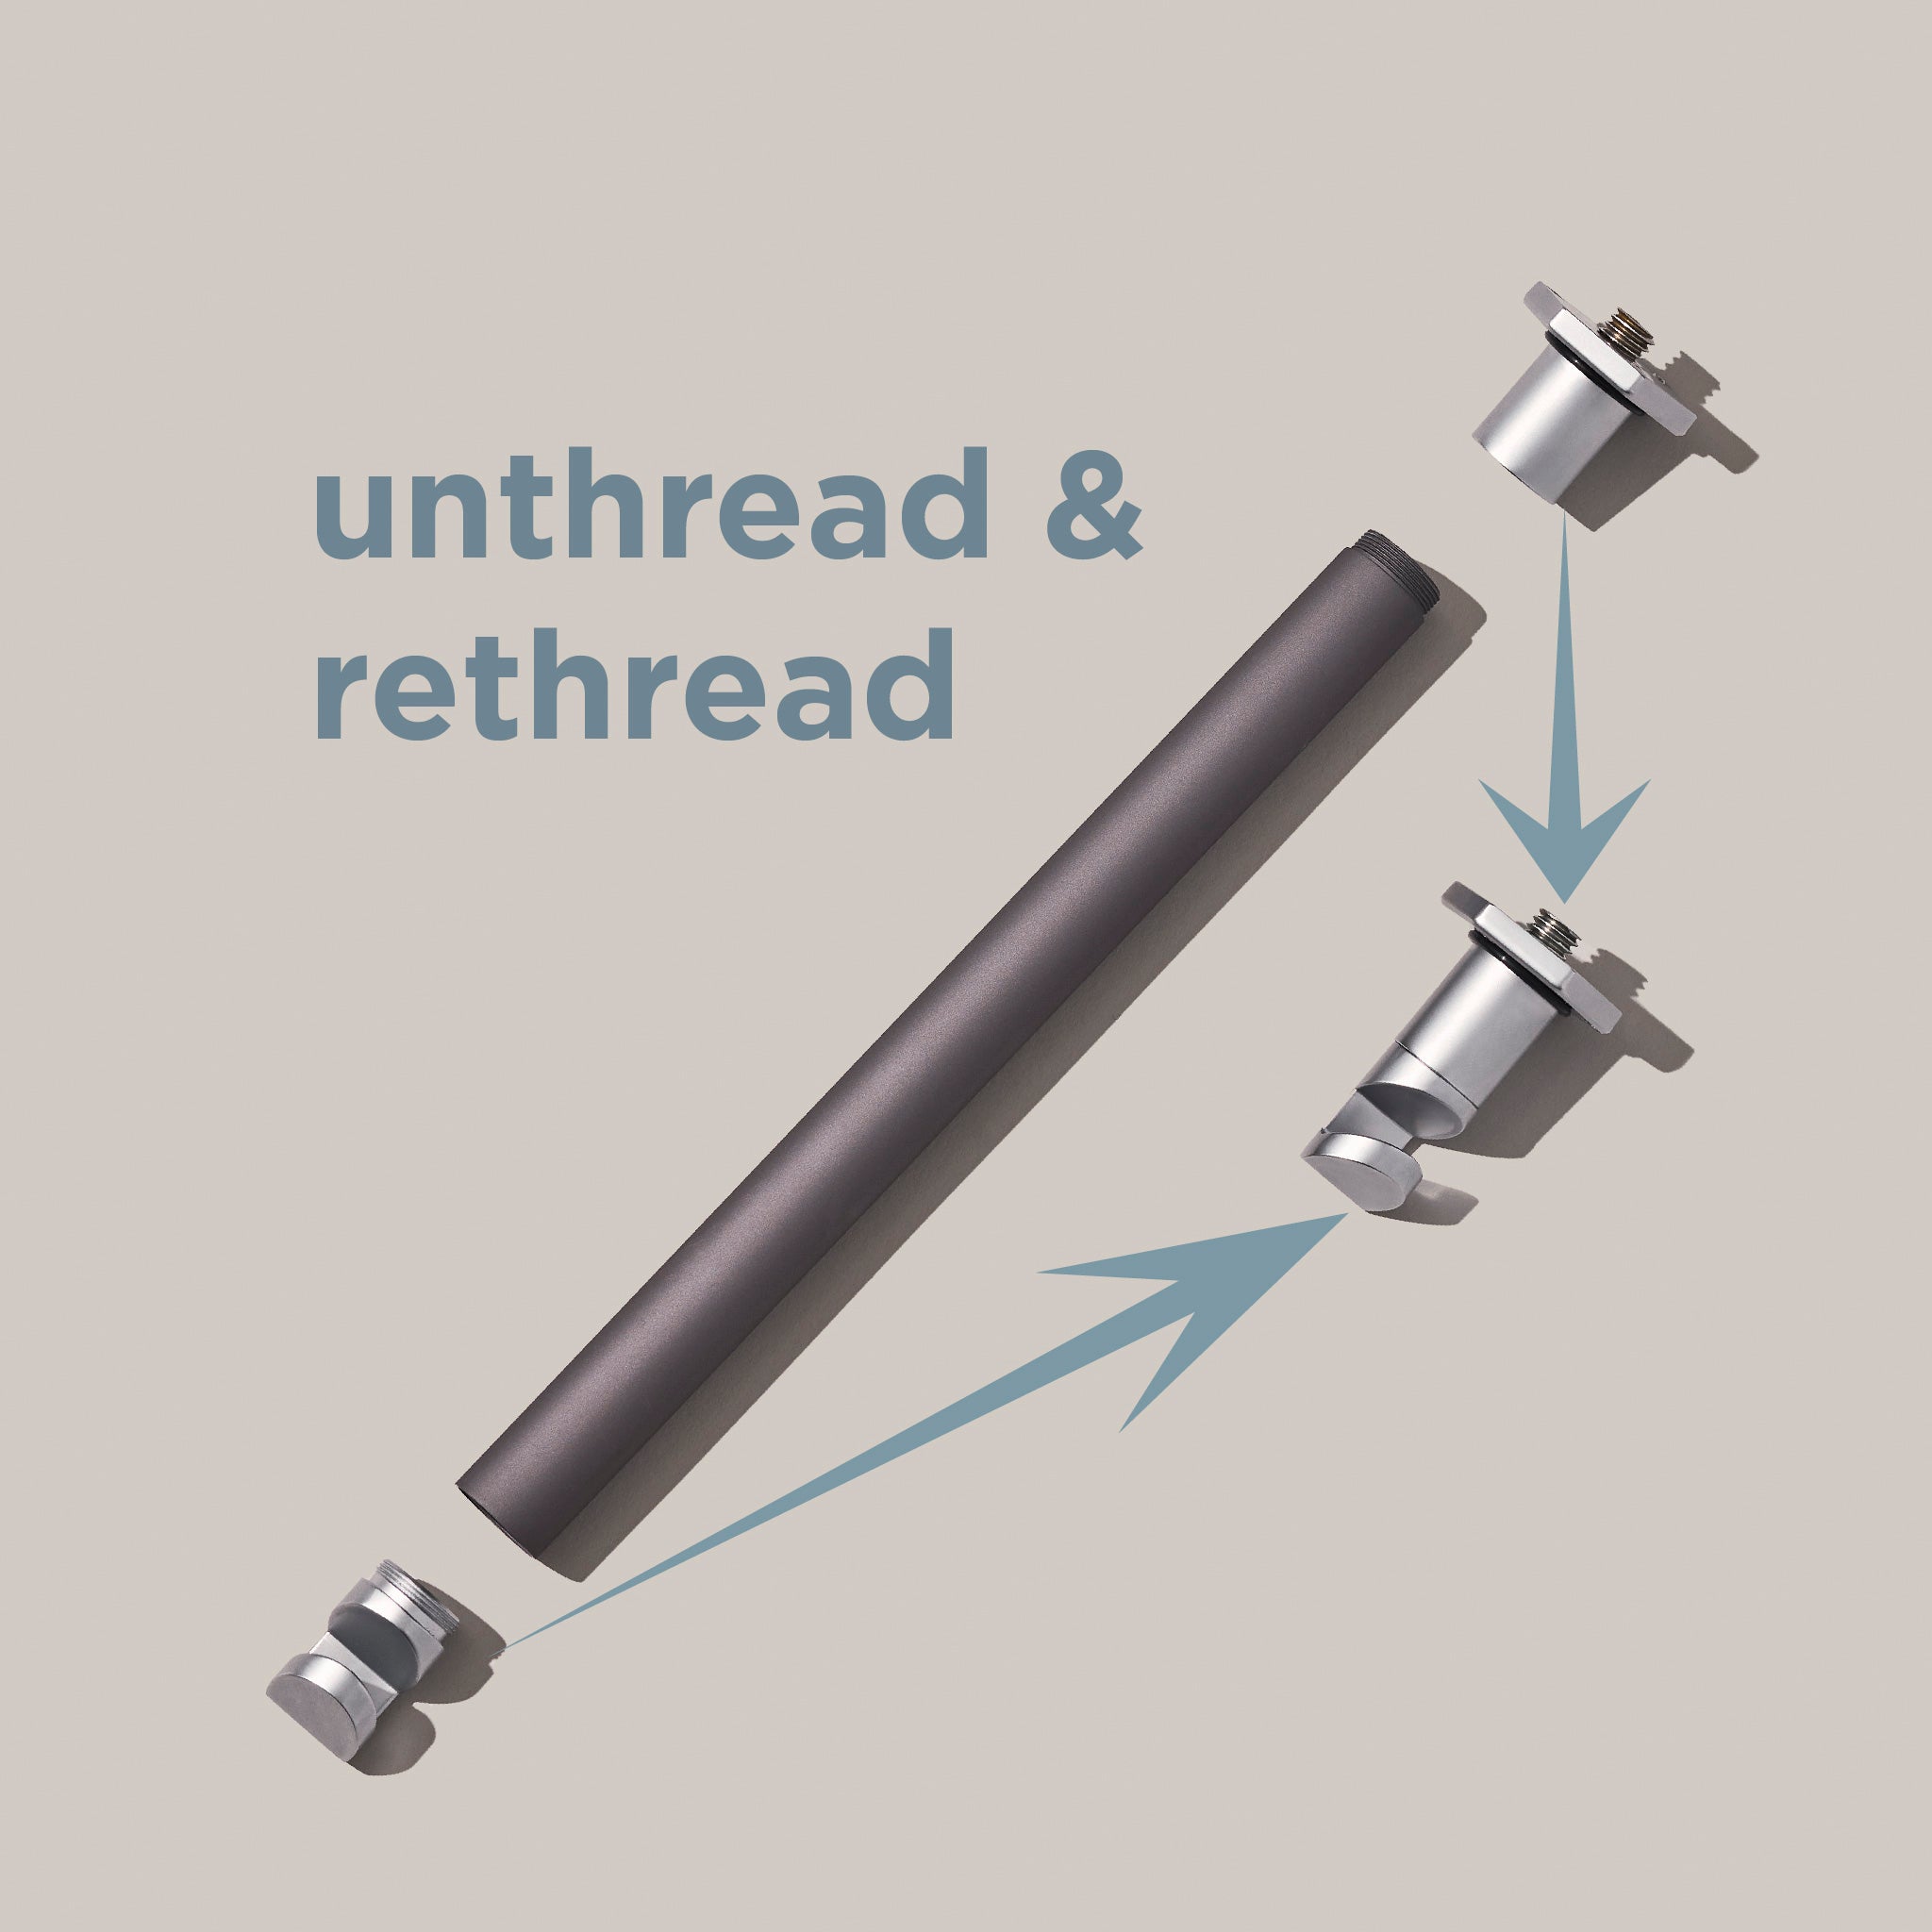
Shed Weight
Pack too heavy? Don't use a center column?
Unthread the top platform and bottom hook from your center column and set the column aside. Thread the platform and hook together. Insert back into tripod and tighten thumb screw.
Maintenance
For optimized performance and product longevity, please review the tripod maintenance page.
Stumped?
Reach out for help!
